Hosted by OSOS , contributed by mdakanali on 9 June 2019
A program to look for solutions to "real life" problems. The project will consist of weekly encounters. It begins with the imparting of skills in teamwork, followed by a division into professional courses (product design, circuits design, Raspberry Pi, PLC S7-1200, Programming in Language Python, application development, management, and research) and working groups (around 3 groups of 8 students per group, one from each professional specialization). Formation of the working groups is done around the departments of the Electrical and Computer Science, in which each group, in its department, has to choose a subject to deal with, by following these steps: making research to identify needs, defining a problem, finding solutions and formulating a prototype or a model. At the end of the year, students will present their products at a festive event.
General resources needed:
- School staff: 3 teacher per 24 pupils
- computers (1 for every 1 pupils)
- 2 computer classrooms
- Raspberry Pi + relevant accessories
- PLC S7-1200
- HMI screen
- equipment for makers workshop
Responsible Research and Innovation
One of the key aspects of OSOS is the inclusion of RRI - Responsible Research and Innovation principles (more information at RRI-Tools.eu). This is how the iSTEAM Accelerator fits into the RRI model:
|
Governance |
students will be responsible for involving different stakeholders, with whom they will maintain a continuous relationship with the objective of improving problems in the school environment.
I.e.: Students will be in continuous contact with stakeholders, who will be involved in the different phases of the activity in order to achieve the best results of the project. students will communicate the different advances in a transparent and reflective way. |
|
Public engagement |
Students will encourage the participation of stakeholders in the activity, making it proactive. Students will be able to make decisions collaboratively, sharing responsibility for the final results with stakeholders.
I.e.: students will get in touch with families and neighbors, whom they will interview and ask about problems around the school. In addition, all these external agents will be able to communicate to students both their opinions and what solution is better from their point of view, which will help students to make collective decisions. |
|
Gender equality |
When considering the scientific project, from its conception to its final solution, students will take into account the gender dimension. To do this, they will make equal decisions and ask both men and women, analyzing if there are differences in their opinions.
I.e.: Equal work division between female and male students when working in groups. |
|
Science Education |
Students will involve their environment to solve social problems and challenges through technology and science. The stakeholders can participate as active elements during the project.
I.e.: students will be supported by various types of stakeholders during different phases of the project, including both the search for challenges and problems and the proposal of solutions through Science that can solve them. |
|
Ethics |
Students will align their research with social values and the needs of the environment. For this, they will share the responsibility with different stakeholders (such as neighbors and families), whose opinions will be taken into account when reflecting on the problems of the school environment.
I.e.: students will be able to take advantage of science to improve the dangers that may exist around the school, providing a technological solution that will be innovative and also social. |
|
Open Access |
Students will be responsible for creating a series of materials that they can then disseminate to families and neighbors. To do this, they will study the types of licenses that exist and determine which are the most appropriate for their materials.
I.e.: the highlights of the projects and all the materials will be published to the public. The project will be advertised in local media and the facebook pages of the Municipality. |
Υπεύθυνοι Καθηγητές για το έργο μας είναι:
Δακανάλη Μαρία, ΠΕ86, Πληροφορικής
Διακάκης Γεώργιος, ΠΕ87, Ηλεκτρολογίας
Μπορείτε να επικοινωνήσετε με το σχολείο μας
Εσπερινό ΕΠΑΛ Ιεράπετρας
Εμμ. Λαμπράκη 8 , Τ.Κ. 72200
Ιεράπετρα
e-mail: mail@3epal-esp-ierap.las.sch.gr
δικτυακός τόπος: http://3epal-esp-ierap.las.sch.gr ή https://esperinoepalierapetras.blogspot.com
Sentir
Μιας και βρισκόμαστε στην νοτιότερη πόλη της Ευρώπης, την Ιεράπετρα.και την πιο ζεστή λόγω κλιματικών συνθηκών, και μετά από παρότρυνση των ίδιων των μαθητών μας αποφασίσαμε να δημιουργήσουμε έναν μετεωρολογικό σταθμό για το σχολείο μας.
Σκεφτήκαμε να τον κάνουμε αυτόνομο με την έννοια ότι θα μπορεί με ειδικά φωτοβολταικά πάνελ να δίνει την απαιτούμενη ενέργεια που χρειάζεται για να είναι σε λειτουργία όλα τα κυκλώματά του, Ένας μετεωρολογικός σταθμός που θα στέλνει τα δεδομένα του σε έναν Εξυπηρετητή (Server) και θα έχουμε την δυνατότητα να βλέπουμε τις μετρήσεις από μακρυά.
Imaginar
Το έργο μας αποτελείται από 24 μαθητές όπου τους χωρίσαμε σε 3 ομάδες των 8 ατόμων.
Η ολομέλεια της 1ης ομάδας αποφάσισε να σχεδιάσει πως φανταζόμαστε ότι θα είναι το έργο μας έτσι ώστε να δώσουμε το έναυσμα στις υπόλοιπες ομάδες να εργαστούν με τα υλικά μέρη του έργου.
Η 1η ομάδα φαντάστηκε και κατασκεύασε στο Google Drawings το σχέδιο του σταθμού μας:

Οι ομάδες λοιπόν αποφάσισαν ότι ο μετεωρολογικός σταθμός θα περιλαμβάνει:
- Το Εξυπηρετητή (Server) :
- Από ένα modem-router στον οποίο θα πρέπει να κάνουμε κάποιες βασικές ρυθμίσεις συνδεσμολογίας για τον Server μας και την VPN σύνδεσή μας
- Τον μετεωρολογικό σταθμό μας που θα είναι ένα Raspberry Pi και το PLC Siemens S7-1200 με τα αισθητήρια πάνω όπως είναι της βροχής, της θερμοκρασίας, της Υγρασίας, της Ατμ.Πίεσης, και του Ανεμόμετρου
- ΗΜΙ οθόνη απεικόνισης από το PLC S7-1200 τη γραφική απεικόνιση του ανέμου από το ανεμόμετρο
- GPS/GPRS Sim808 v3.3.2 για αποστολή μέσω sms αλλά και στον server την θέση του μετεωρολογικού σταθμού
- Camera να μας δείχνει εικόνα από το σημείο.
Crear
Μετά από την ολομέλεια της 1ης ομάδας, 2ης ομάδας και της 3ης ομάδας και την έρευνα που έκαναν καταλήξαμε στα υλικά που θέλουμε για τον μετεωρολογικό μας σταθμό:
Οι ομάδες λοιπόν αποφάσισαν ότι ο μετεωρολογικός σταθμός θα περιλαμβάνει:
- Το Εξυπηρετητή (Server) : στον οποίο εγκατέστησαν:
- τον Apache Server και
- τον PHP Server για να δημιουργήσουμε την σελίδα μας που θα φιλοξενεί τα δεδομένα του μετεωρολογικού σταθμού.
- MySQLi Βάση Δεδομένων μας που έχουμε δημιουργήσει την Βάση Δεδομένων Weather Station και τον Πίνακα data όπου θα αποθηκεύουμε τις μετρήσεις από τα αισθητήρια του Μετεωρολογικού Σταθμού
- Δημιουργήσαμε μια VPN σύνδεση ανάμεσα στο Μετεωρολογικό Σταθμό και τον Server για να έχουμε αξιόπιστη σύνδεση χωρίς παρεμβολές από άλλους μέσω της σύνδεσής μας.
- Το Modem-Router στο οποίο συνδέετεαι ο Server μας:
- Έπρεπε να κάνουμε Port-forward και να ανοίξουμε κάποιες θύρες για να μπορέσουμε να επικοινωνήσουμε με τον Server μας
- Ports 80, 1194
- Έπρεπε να ανοίξουμε και την πόρτα 1194 για το OVPN
- Επίσης για να έχουμε πρόσβαση απομακρυσμένα από άλλες συσκευές ή υπολογιστές έπρεπε να δημιουργήσουμε Dynamic DNS Server
- no-ip --> δεσμεύσαμε ένα Domain Name για να βλέπουμε τη σελίδα του Server μας : espepaledu.ddns.net
- Ο Μετεωρολογικός σταθμός περιλαμβάνει:
- Αισθητήρα SenseHat (Θερμοκρασία, Υγρασία, Ατμοσφαιρική Πίεση)
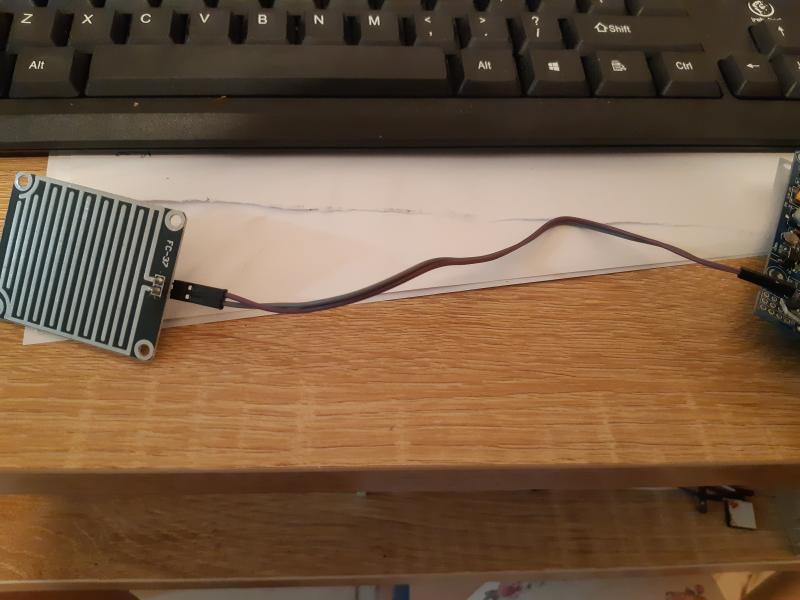
- Αισθητήρα Βροχής - RainDrop Sensor
- OVPN Client
- SSH Client/Server
- Σύνδεση με PLC S7-1200 μέσω MODBUS επικοινωνίας αποστολή δεδομένων στον Server
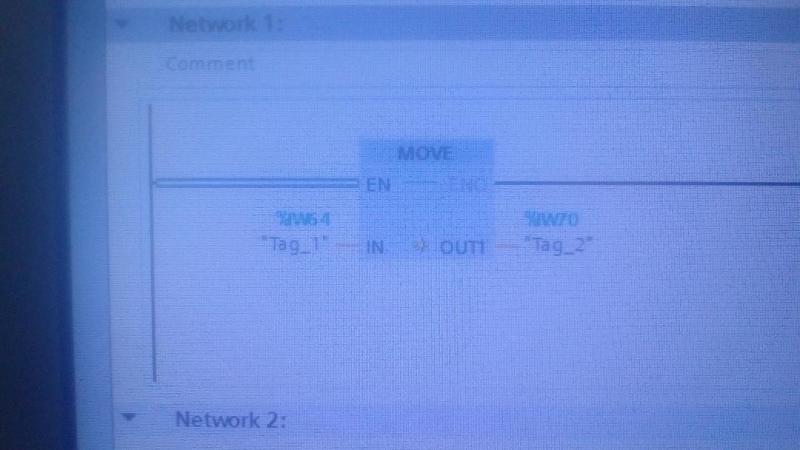
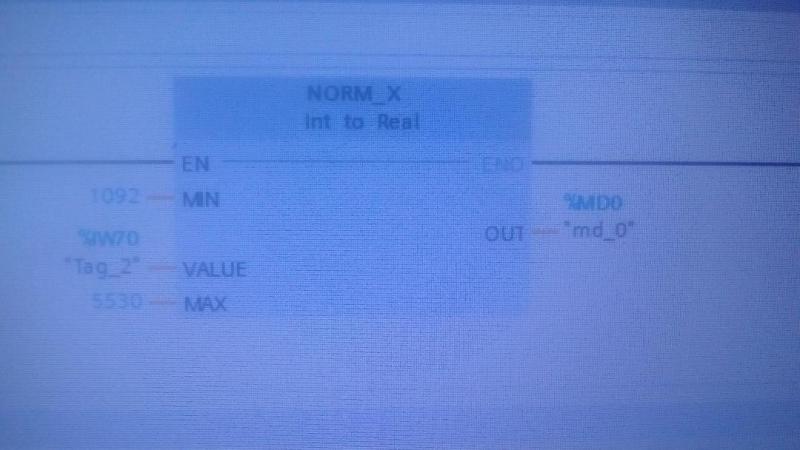
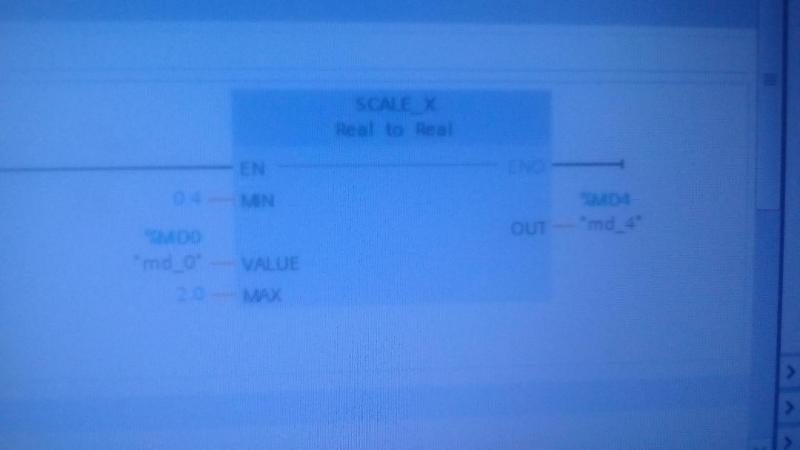
- PLC S7-1200 με τον ασθητήρα Ανεμόμετρου
- Απεικόνιση σε οθόνη HMI της γραφικής Παράστασης του Ανέμου
- GPS/GPRS Sim808 v3.3.2 για αποστολή μέσω sms αλλά και στον server την θέση του μετεωρολογικού σταθμού
- Camera να μας δείχνει εικόνα από το σημείο
Το Υλικό μέρος (Hardware) για το στήσιμο του μετεωρολογικού σταθμού, μετά από έρευνα αγοράς και παραγγελίας από την 3η Ομάδα, αποτελείται από:
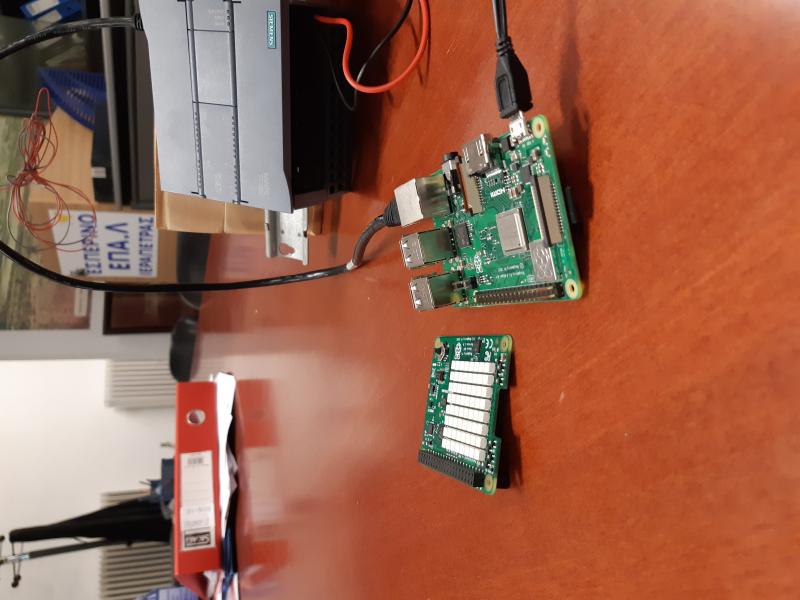
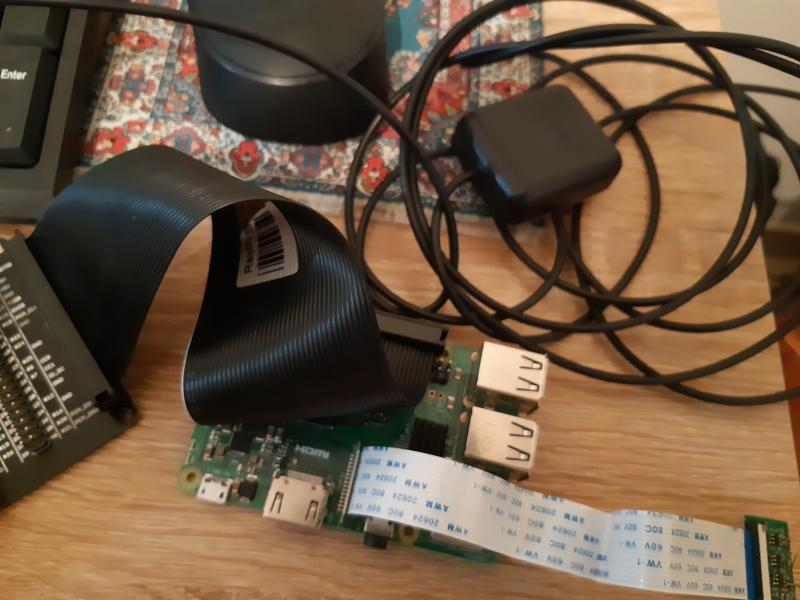
- 2 Raspberry Pi 3B+
- 1 PLC Siemens S7-1200
- 1 HMI οθόνη για το PLC
- 1 Camera
- SenseHat αισθητήριο για να πάρουμε την Θερμοκρασία, Υγρασία, Ατμ.Πίεση
- RainDropSensor
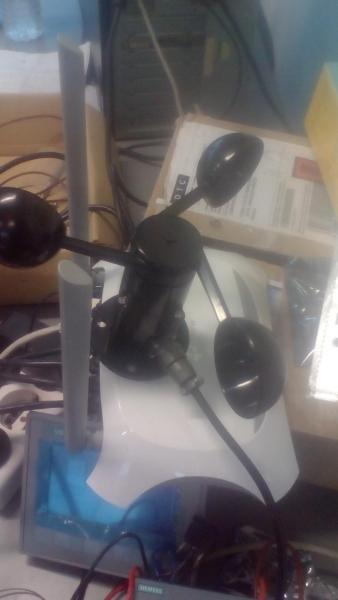
- Anemometer - Αισθητήρας ανεμόμετρου
- GSM/GPRS module και μια κάρτα σύνδεσης What;s up
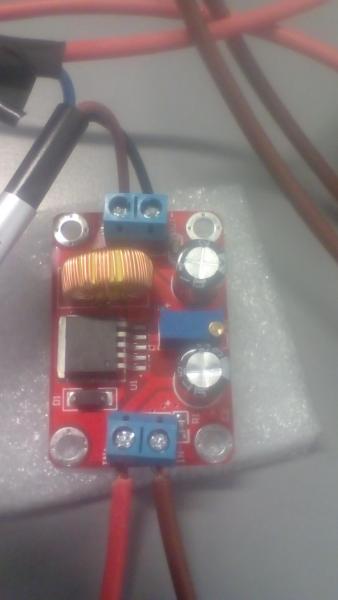
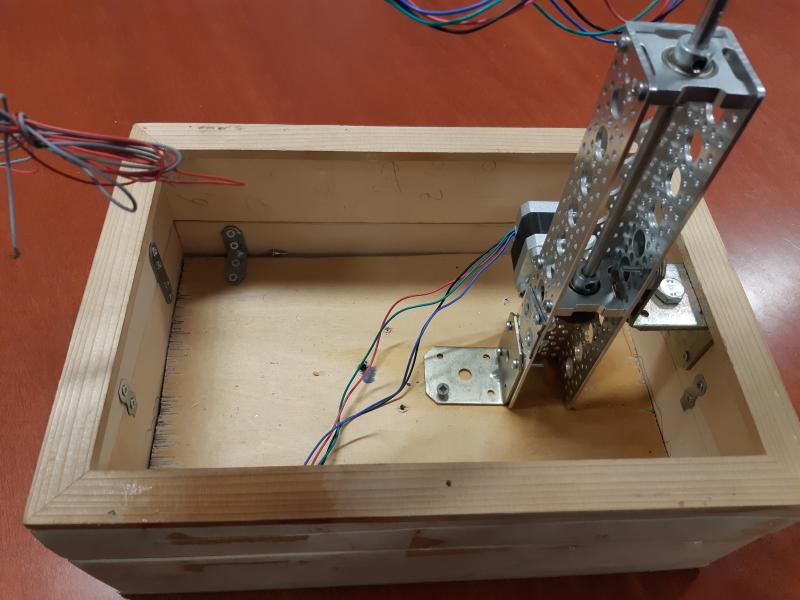
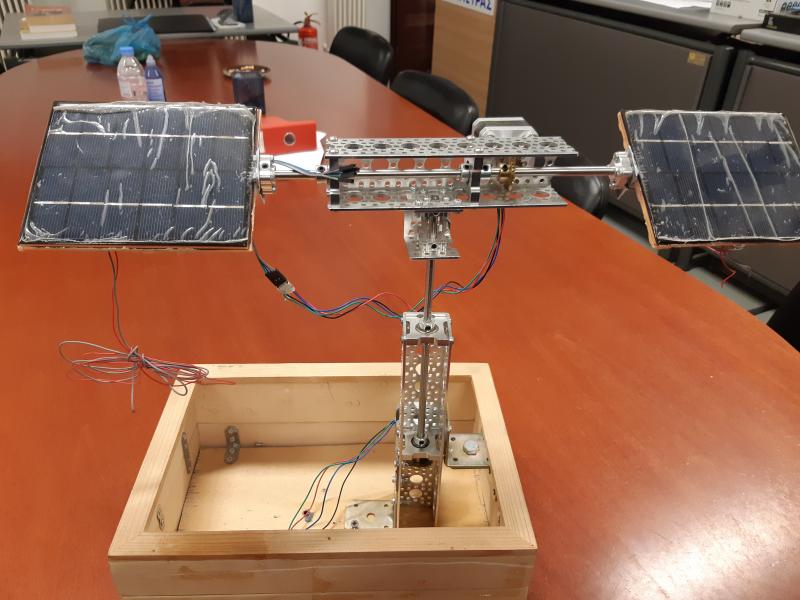
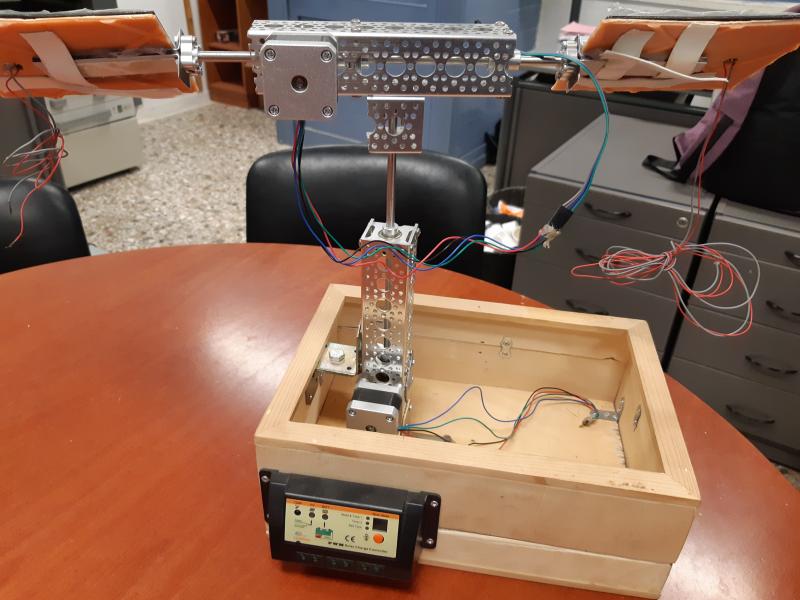
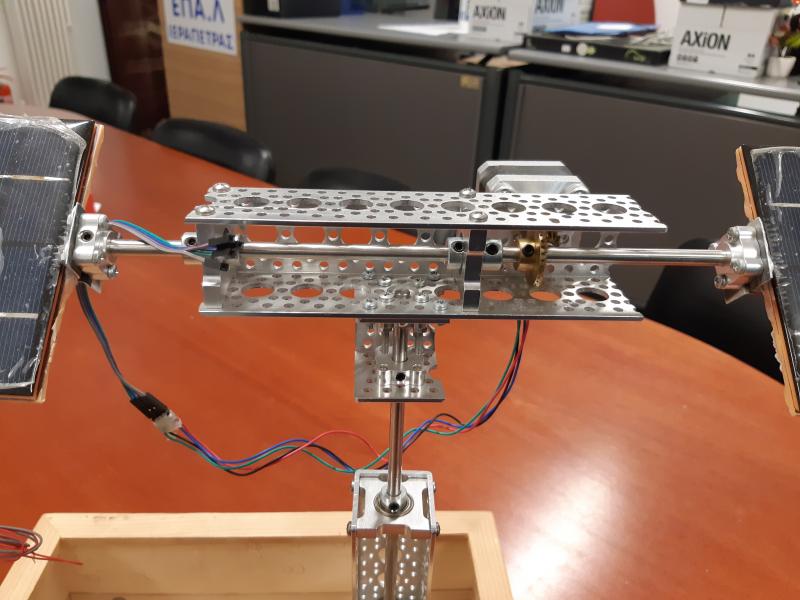
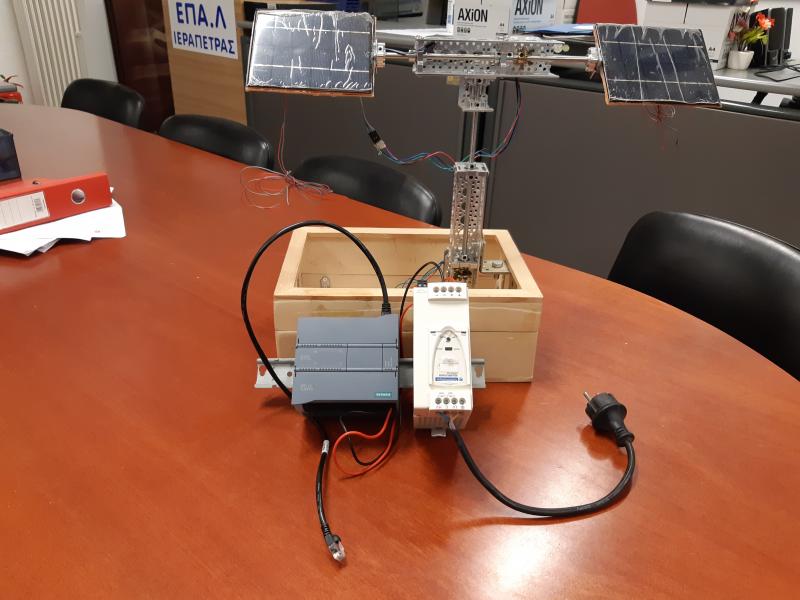
Η 1η και 2η ομάδα μαθητών μας κατασκεύασαν το κουτί με τα φωτοβολταικά πάνελ και μέσα σε αυτό θα στηρίξουμε τα υπόλοιπα μέρη του σταθμού μας:

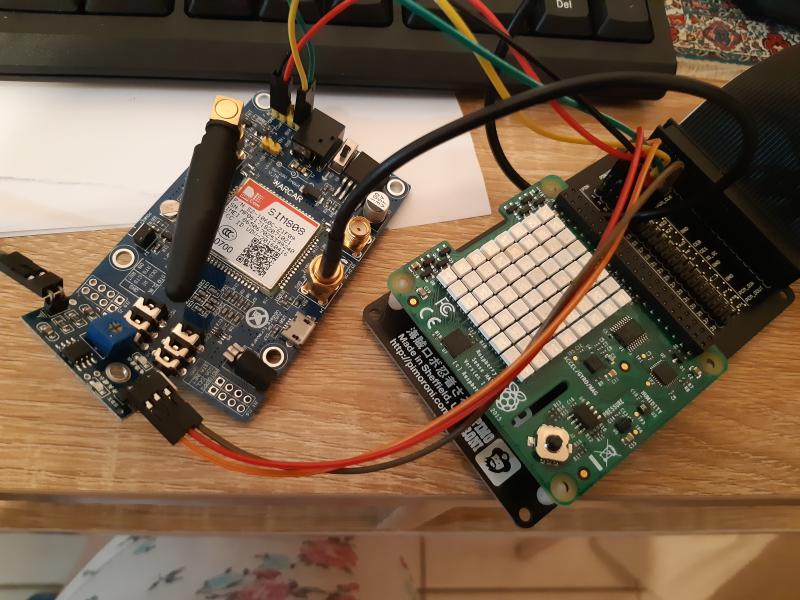
Η 4η ομάδα μαζί με την 5η ομάδα θα στήσουν τον Server (Raspberry Pi) και θα προγραμματίσουν τα αισθητήρια που θα μπούν στο μετεωρολογικό σταθμό (2ο Raspberry Pi):
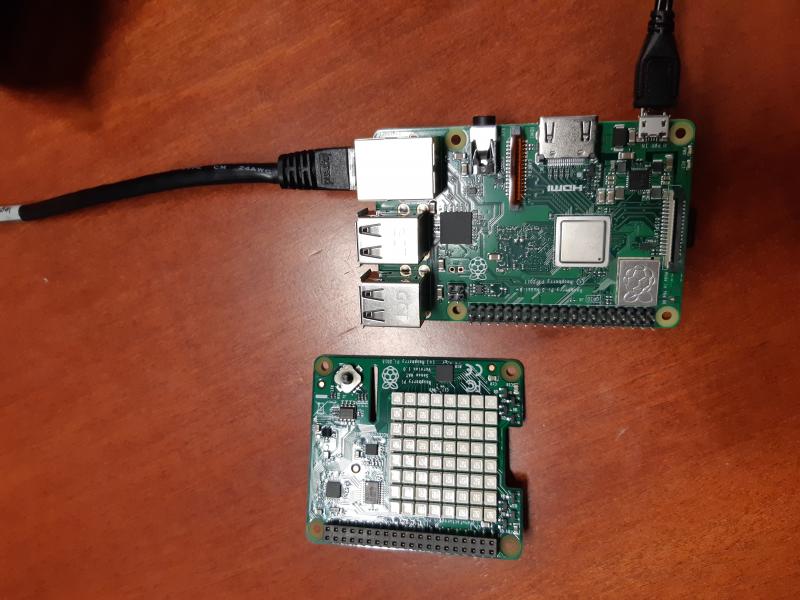
Σύνδεση SenseHat (Temperature, Humidity, Pressure) , Raindrop Sensor, GSM/GPRS module, Camera:


Η 6η ομάδα θα δημιουργήσει τις γραφικές απεικονίσεις των αισθητηρίων και το φωτογραφικό υλικό με τη σύνδεση του PLC με το Ανεμόμετρο: