Materials:
A camera that allows you to set long exposure times (30 s - 1 minute);
A camera tripod (or just a small table or a something similar where rest the camera); Point light sources such as LED flashlights and the like of different colors that can possibly be activated by simply pressing a button;
A darkened environment;
A computer to show an introductory presentation to the activity;
A Power Point presentation introducing the history and the significant issues of this activity.
The explainer starts the activity using a Power Point presentation showing some examples of light paintings. He asks the participants if the pictures he is showing are drawings or photographs. If nobody of them already knows, they will be a bit perplexed and nobody will be able to give a clear response.
To let the participants guess how have been realized the images, the explainer will give them some LED flashlights.
The presentation will go on showing some other particularly significant pictures. In particular, some pictures showing that light paintings are made in a real threedimensional space so, if the subjects are drawn at different distances from the camera, the proportional dimensions of the drawn objects are automatically returned in the two-dimensional image obtained. Unlike what happens when making a drawing on paper, in which case it is the draftsman who has to represent the dimensions of the objects in relation to their distance from the point of view. The presentation will show also some different pictures in which also the exposure time, the environmental light or the shape and the intensity of the light sources affect the final results.
The presentation then traces the history of this particular photographic technique.
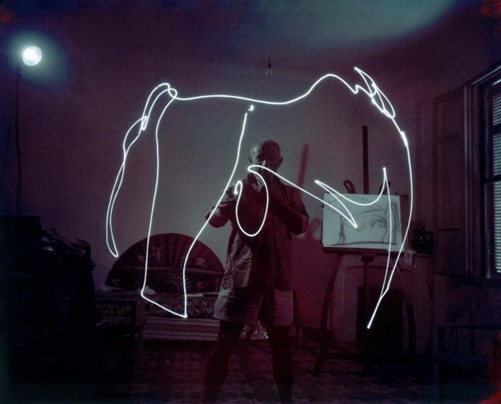
On 1948 the American photographer Mili Gjon from the magazine Life met the
Spanish artist Pablo Picasso and proposed him to realize some light paintings. After some first attempts, Picasso was glad by this experience so that he meet Gjon in his home in southern France more times in the following years realizing progressively more sophisticated “paintings”.
On the web are available pictures of the light paintings made by Picasso and Gjon to be used for our presentation .
In particular, some of them could let the participants make some interesting observations: in some cases is evident the drawings made by Picasso develop on a spherical and not flat surface as happens when drawing on a sheet of paper. This happens because in a three-dimensional space the artist's arm works like the rod of a compass.
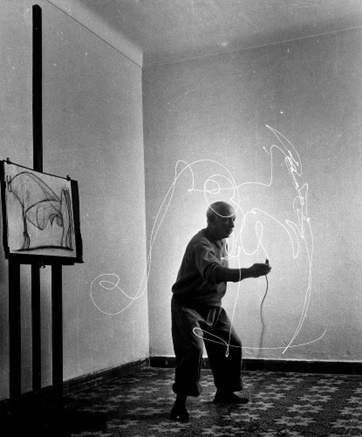
Other images, on the other hand, highlight the difficulty even of a great artist like Picasso in closing the contours of the images he is creating. This happens because the designer does not perceive the drawing that he is progressively creating, as happens instead when drawing on a sheet of paper. This aspect of the experience strongly tests the skills in spatial imagination of the participants.
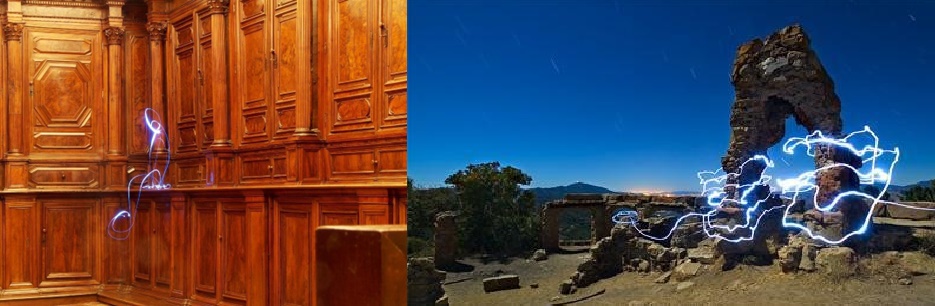
The final slides of the presentation will show some examples of pictures showing peculiar features, like for instance:
● light paintings drawn in a completely or partially darkened place;
● light paintings involving also peoples or real objects as subjects (of course such kinds of pictures could be made only in a partially darkened place);
● light paintings made outdoors in the twilight light (this type of images will highlight the phenomenon of the accumulation of light on the camera sensor during long exposures).
Proceedings, description:
The explainer will then illustrate to the participants how to carry out the experience:
He will establish an equal exposure time for each photograph (in our experience a time of 30 - 45 seconds is fine);
He will darken the environment in which you are working (it is advisable for the explainer to investigate the lighting system in advance and experiment with the different possible darkening conditions to understand which are the most suitable for realizing the experience);
Participants will draw their own light painting in turn. Since the duration of this depends both on the exposure time decided and on the processing time of the image, the temporarily inactive participants will design their own light painting and will eventually agree with their classmates to create more or less complex in collaboration with each other.
Once all the participants have made their own light painting, the explainer will collect and project them on a large screen. The final screening will be the starting point to discuss issues relating to the arrangement of space in the various images.